In this article, you will be shown the most important details regarding changing the desktop background. This will include how to customize the desktop background, how to set one or more images as wallpaper, how to set up a Windows auto play background as often as you want and the order you want your items to appear in. You will also be shown what options you have in terms of positioning the background image on the screen and.
To customize the desktop background, you should follow a few simple steps:
Step 1. The first thing to do is to have a folder or a library with all the images that you want to use as wallpapers. This is because you cannot select multiple folders or libraries, with Windows allowing you to use only wallpapers from a single location. You can either use your own photographs or download some. Microsoft has its own gallery of free wallpapers that you can use to download pictures you like.
Step 2. Right-click the desktop and choose Personalize.
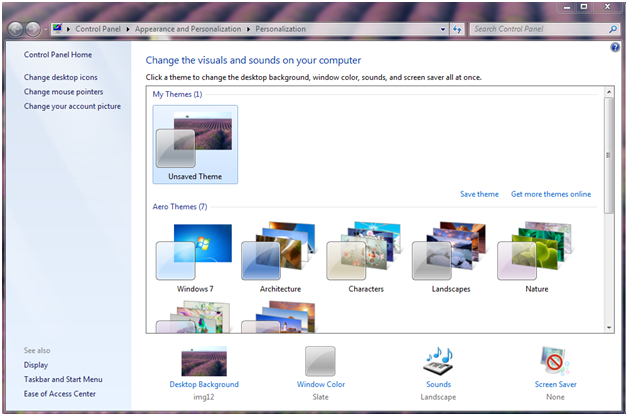
Step 3. This will bring up the personalization control panel, shown in the picture below. Click Desktop Background, located at the bottom of the window.

Step 4. The window that just opened contains all the default folders of the Windows wallpaper feature. In order to select the pictures you want to use just click Browse and use CTRL to select multiple items.
Step 5. At this point you can see all the images in the selected folder. You can deselect the images you do not want to appear on your background using the checkbox on the left side.
Step 6. Now we can choose the position of the background image. For positioning, you have the following options:
- Filling – this option will increase or reduce the image to make it fit the whole desktop. If the image is smaller than the desktop, it will be large4, and if it is larger, it will be cropped.
- Match – with this option enabled, your photo will appear as it is, without distortion or clipping.
- Extension – This option will stretch the image to the same size as the screen.
- Frames – this option will repeat your image to fill the screen. If the picture is larger than the screen, you will only see its left corner, the rest will be cut.
-
Center – This will position the image in the center of the screen. If the image is larger, you can only see the middle of it, the rest will be cut.
Step 7. If you do not choose the right centering option, then you may end up with blank portions surrounding your image. Because of this Windows, also offers you the chance to choose a background color. Simply click the “Change background color” under the “Image Location” and choose the desired color. This will fill the remaining empty space on the screen with that color.
Step 8. One of the new features of Windows is that the desktop wallpaper can be changed automatically at a chosen time interval. You can select the time interval for this purpose by using the drop-down menu under “Change picture every”.
Step 9. You can also enable the option of mixing. If you choose to enable it, Windows 7 will randomize the order in which images are displayed as desktop backgrounds. If you select this option, images will be displayed alphabetically by their names.
Step 10. When you have selected all desired settings do not forget to click Save changes.