Adding a window in several areas of your home where light is needed is not always cost-effective. For this reason, the idea of sunpipes was born.
What are Sunpipes?
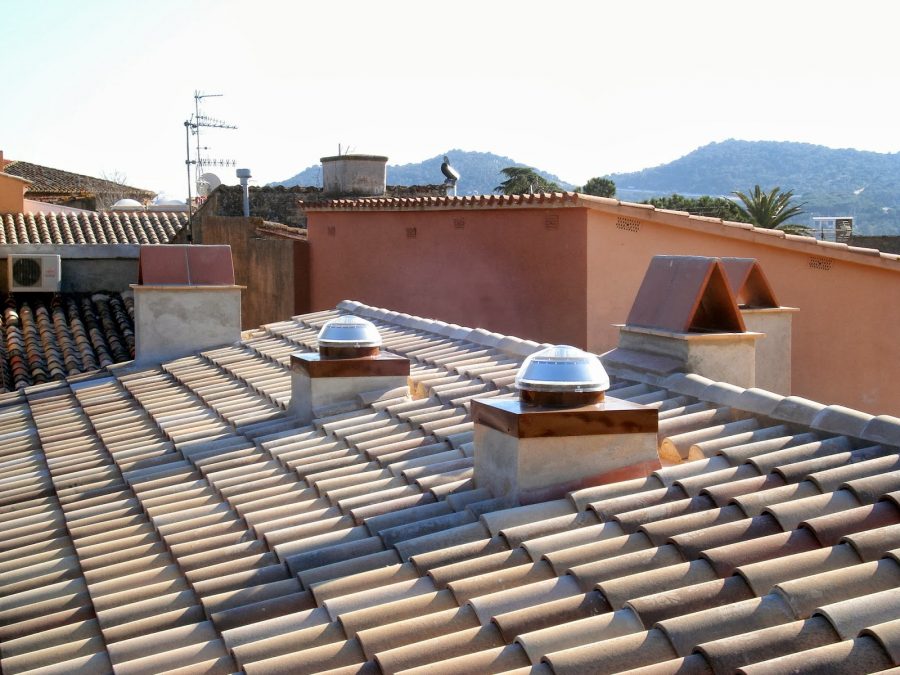
Sunpipes bring natural daylight to windowless areas in your home. So if your main goal is to make your indoor space brighter, healthier, and more sustainable, sunpipes are the answer.
Because sunpipes are reflective tubes, they’re able to introduce sunlight into spaces in your home where conventional rooflight is not feasible.
These spaces could include:
- Loft
- Corners
- Upper stories
- Stairwells
- Or any dark landing where artificial lighting is needed
Benefits of Sunpipes and Natural Daylight
With regular exposure to natural daylight provided through sunpipes, your family members at home can become more productive and healthier.
Here are more benefits to help you convince sunpipes are worth installing in any area of your home, especially those where family members mostly spend their time on:

- Improve sleep pattern and mood
- Alleviate pain
- Reduce depression
- Environmentally-friendly
- Reduced carbon footprint
- No maintenance required
- No structural alterations
- Suitable for all roof types
- Easy to install
How are Sunpipes Installed?
Another good thing about sunpipes is they are very easy to install. If you are keen on doing it yourself, here are the steps for a safe and successful installation:
- Prepare the area where you’ll install the sunpipes.
Create an even space for the tube to receive maximum amount of light. Use a tape to mark the rafters as you’ll be using them later when it’s time to cut the middle hole. Mark the center point of the tube then use a screw and a pencil to create a perfect circle.
- Drill a hole for the tube.
Create a starter hole then cut the ceiling using a jigsaw. After that, cut the hole which is adjacent to one of the rafters.
- Install the pipe.
Use the cut out piece of the ceiling and a nail so you can cut a hole on the roof that matches the first one you have created. Place the flashing under the roofing material. Slide the tube and hold it steady by screwing it to the adjacent joists. This way, you are able to secure the tube in place.
- Complete the installation.
Attach the foam tape to the flange’s outer part. Put the diffuser at the bottom of the tube then screw it into place. Lastly, have the plastic screw caps and finish ring attached.
Doesn’t look too easy? If these steps look complicated to you and you don’t feel comfortable to tackle it as a DIY project, it’s ask a roofing specialist to do the installation for you. A trusted roofer will be more than willing to assist!
Written by True Son Exteriors, the best contractor for roofing in Columbia, MO.