The computers in a network can be part of a network domain or a HomeGroup. The difference between the two consists in the way resources are managed on the network. While network domains are a good choice for business networks, HomeGroups are exactly what you need for easily sharing files between computers at your home. In the following lines you will be provided with some information on how to configure the settings for both Windows 7 and Windows 8.
Network domains vs. Working Groups
Network domains are used in large networks that include servers, desktops, laptops, network printers and other devices. When it comes to domain, network administrators should apply the rules and settings for all network computers and devices, manage their performance level, their safety and should solve all the problems that may arise. To access a computer from a domain, it is not necessary to have a defined user account on that computer. You must have a user account defined for the domain associated with it by the network administrator. Therefore, you can connect to any computer in the domain, using the same user account.
Home groups, on the other hand, are used in small networks, where each computer has its own set of rules and settings. They are mainly used in home networks or small business networks. To access a computer from a HomeGroup, you must have a user account defined on that computer. There is no domain specific user account that can be used on all computers. As a result, you can work on these computers only if you have an account defined on each of them.
How to access HoomeGroup settings in Windows 7 and Windows 8
You can view the network domain or HomeGroup your computer is connected to using both Windows 7 and Windows 8. The classical method is to go to Control Panel -> System and Security -> System. Here you will find a section called “Computer name, domain and workgroup settings”, just as in the image below. You will see an entry called Working Group, which displays the active workgroup your computer or device is connected to.

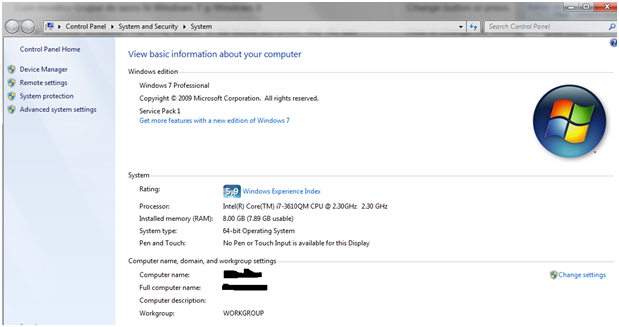
Now let’s see how to change the current group with another. In the System window, click or click on “Change Settings”, to the right of the sectioned mentioned above. This will open the System Properties window. In the Computer Name tab, click the Change button. A window similar to the one below should appear.
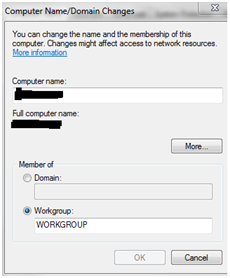
In the workgroup field, type the name of the workgroup to which you want to connect and click or press OK. You will see a welcome notice. Click or tap on OK. You will be required to restart the computer for the changes to be applied. Windows will ask if you want the system to restart now or later. Before clicking Restart Now, make sure you close all open applications or files.
All in all, changing the workgroup in Windows 7 and Windows 8 is a simple procedure, accessible to anyone, so make sure you take advantage of this feature.